今回はswagger.yaml の書き方についてご紹介します。
🔗 Swagger Editorの活用
Swagger.yamlを書く際には、
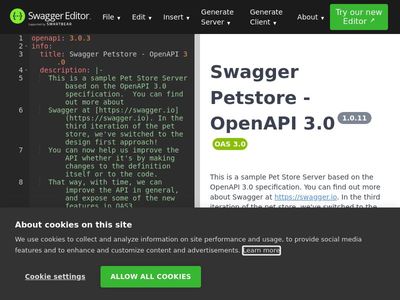
Swagger Editor
 を利用すると便利です。このオンラインツールは、APIのドキュメントをリアルタイムでプレビューしながら編集できるため、エラーを減らし、効率的にAPI仕様を完成させることができます。
openapi: 3.0.3
info:
  title: Sample API
  description: This is a sample API to demonstrate Swagger documentation.
  version: "1.0"
  termsOfService: https://api.sample.com/terms
  contact:
    name: API Support
    url: https://support.sample.com
    email: support@sample.com
  license:
    name: Apache 2.0
    url: https://www.apache.org/licenses/LICENSE-2.0.html
servers:
  - url: https://api.sample.com/v1
paths:
  /users:
    get:
      summary: List all users
      operationId: listUsers
      tags:
        - Users
      responses:
        '200':
          description: A list of users.
          content:
            application/json:
              schema:
                type: array
                items:
                  $ref: '#/components/schemas/User'
    post:
      summary: Create a new user
      operationId: createUser
      tags:
        - Users
      requestBody:
        required: true
        content:
          application/json:
            schema:
              $ref: '#/components/schemas/NewUser'
      responses:
        '201':
          description: User created
          content:
            application/json:
              schema:
                $ref: '#/components/schemas/User'
  /users/{userId}:
    get:
      summary: Get a user by ID
      operationId: getUserById
      tags:
        - Users
      parameters:
        - name: userId
          in: path
          required: true
          schema:
            type: integer
        - name: includePosts
          in: query
          required: false
          schema:
            type: boolean
            default: false
      responses:
        '200':
          description: A user object.
          content:
            application/json:
              schema:
                $ref: '#/components/schemas/User'
components:
  schemas:
    User:
      type: object
      properties:
        id:
          type: integer
          format: int64
        username:
          type: string
        email:
          type: string
    NewUser:
      type: object
      required:
        - username
        - email
        - password
      properties:
        username:
          type: string
        email:
          type: string
        password:
          type: string
🛠️ openapi と info セクションの設定
APIに関する基本情報
| フィールド | 説明 | 必須 |
|---|---|---|
| title | API名 | ◯ |
| description | API概要 | ◯ |
| version | APIバージョン | |
| termsOfService | 利用規約 | |
| contact | 問い合わせ先 | |
| license | ライセンス |
🚀 paths セクションの詳細
paths セクションでは、APIの各エンドポイントとその操作を定義します。例えば、ユーザーの一覧取得や新規ユーザーの作成など、具体的なリクエストとレスポンスの構造を定義することができます。
paths:
  /users: # パス
    get: # リクエストメソッド(get, post, ...etc)
      summary: List all users
      operationId: listUsers
      tags:
        - Users
      responses: # レスポンス
        '200':
          description: A list of users.
          content:
            application/json:
              schema:
                type: array
                items:
                  $ref: '#/components/schemas/User' # スキーマオブジェクト(再利用)
    post:
      summary: Create a new user
      operationId: createUser
      tags:
        - Users
      requestBody: # リクエストボディ
        required: true
        content:
          application/json:
            schema:
              $ref: '#/components/schemas/NewUser'
      responses:
        '201':
          description: User created
          content:
            application/json:
              schema:
                $ref: '#/components/schemas/User'

  /users/{userId}:
    get:
      summary: Get a user by ID
      operationId: getUserById
      tags:
        - Users
      parameters: # リクエストパラメータ
        - name: userId
          in: path # URL引数
          required: true # 必須有無
          schema:
            type: integer
        - name: includePosts
          in: query # クエリパラメータ
          required: false
          schema:
            type: boolean
            default: false
      responses:
        '200':
          description: A user object.
          content:
            application/json:
              schema:
                $ref: '#/components/schemas/User'
🧩 components と $refs の利用
再利用可能なスキーマ定義を components に記述することで、APIの各部で $refs を用いてそのスキーマを参照することができます。これにより、コードの重複を避け、一貫性とメンテナンスの容易さを向上させることが可能です。
schema:
$ref: '#/components/schemas/User'
$refs はスキーマを参照します。 componentsキーワード配下に定義します。
components:
  schemas:
    User:
      type: object
      properties:
        id:
          type: integer
          format: int64
        username:
          type: string
        email:
          type: string
$refsの利点
1. 再利用性
同じスキーマをAPI定義の中で繰り返し再利用することができる。
2. 一貫性
スキーマを更新する際に、1箇所の修正で済む。
3. 簡潔性
繰り返しスキーマを定義する必要がなくなり、API定義が簡潔になる。
まとめ
swagger.yaml の書き方について、ご紹介しました! 今の開発現場では欠かせないツールかと思いますので、ぜひ習得してみてください^^

